


Unfinished

Renovate More. Spend Less.
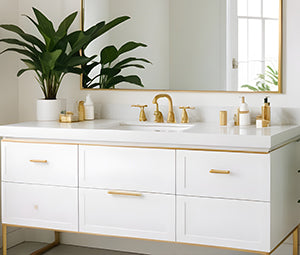
Shop by Category
Everything Your Home Needs
From curb appeal to countertops — find it all in one place.
Completely Free
Dream kitchen.
see it before you buy.
see it before you buy.
Share your measurements, and our designers create a custom 3D rendering of your new kitchen — at no cost, no obligation.
1
Submit your room measurements online or in-store
2
Receive a free custom 3D kitchen design within 1–2 business days
3
Approve the design, choose your cabinets, and get a quote
Most Popular
Best Sellers
From curb appeal to countertops — find it all in one place.
Designed for Your Budget
Complete Kitchen Packages
Pick your size. Compare brands. Know your cost before you commit.
Brand
Color & Finish
Warranty
Price
Monthly Payment

Modernform
10 X 10 Modernform White Shaker Kitchen
Painted
1 Years Limited
$2,388.00
$199
Per month with 0% APR

J&K
10 X 10 J&K White Shaker Kitchen
Painted
5 Years Limited
$2,924.00
$244
Per month with 0% APR

Fabuwood
10 X 10 Fabuwood Galaxy Frost Kitchen
Painted
Limited Lifetime
$4,181.00
$349
Per month with 0% APR
Brand
Color & Finish
Warranty
Price
Monthly Payment

Unfinished
12 X 12 Unfinished Kitchen
Unfinished
5 Years Limited
$2,542.00
$212
Per month with 0% APR

Modernform
12 X 12 Modernform White Shaker Kitchen
Painted
1 Years Limited
$3,398.00
$284
Per month with 0% APR

J&K
12 X 12 J&K White Shaker Kitchen
Painted
5 Years Limited
$4,081.00
$341
Per month with 0% APR

Fabuwood
12 X 12 Fabuwood Allure Galaxy Frost Kitchen
Painted
Lifetime limited warranty
$5,868.00
$489
Per month with 0% APR
Brand
Color & Finish
Warranty
Price
Monthly Payment

Unfinished
15 X 15 Unfinished Kitchen
Unfinished
5 Years Limited
$3,042.00
$254
Per month with 0% APR

Modernform
15 X 15 Modernform White Shaker Kitchen
Painted
1 Years Limited
$4,596.40
$384
Per month with 0% APR

J&K
15 X 15 J&K White Shaker Kitchen
Painted
5 Years Limited
$5,496.00
$458
Per month with 0% APR

Fabuwood
15 X 15 Fabuwood Allure Galaxy Frost Kitchen
Painted
Lifetime limited warranty
$7,335.00
$612
Per month with 0% APR
Brand
Color & Finish
Warranty
Price
Monthly Payment

Unfinished
18 X 18 Unfinished Kitchen
Unfinished
5 Years Limited
$4,356.00
$363
Per month with 0% APR

Modernform
18 X 18 Modernform White Shaker Kitchen
Painted
1 Years Limited
$6,108.00
$509
Per month with 0% APR

J&K
18 X 18 J&K White Shaker Kitchen
Painted
5 Years Limited
$7,341.00
$612
Per month with 0% APR

Fabuwood
18 X 18 Fabuwood Allure Galaxy Frost Kitchen
Painted
Lifetime limited warranty
$9,999.00
$834
Per month with 0% APR
Not sure which size fits your kitchen? Get a free custom quote.
Zero Down & 0% Interest for 12 Months
Don't let budget hold back your renovation. Qualify for no-interest financing on all purchases.
Why SBMTX
The Smarter Way to Remodel
Thousands of 5-star projects completed across Texas and nationwide.
Surplus Prices
Directly from our 150,000 sq ft warehouse. You pay less — without sacrificing quality.
Free 3D Design
See your new kitchen in 3D before you spend a dollar. Custom designs, no obligation.
Nationwide Delivery
Reliable shipping to all 48 contiguous states. In-store pickup available in Dallas.
Installation Available
We don't just sell it — our team can install it. Turnkey renovations made easy.
Real People, Real Help
English & Spanish support via live chat, phone, and in-store. 20+ years experience.
0% APR Financing
No interest for 12 months on qualifying purchases. Start your project now, pay over time.
Ready to Start Your Project?
Surplus Building Materials
Address
3404 Belt Line Road, Farmers Branch, TX 75234
0 mi
Hours
Mon-Fri: 8:00am - 6:00pm
Sat: 9:00pm - 5:00pm
Facilities
View Direction
AAA Distributor HQ
Address
2501 Grant Avenue
Philadelphia, PA 19114
1487 mi
Hours
Mon-Thu: 8:00am - 7:00pm
Fri: 8:00am - 6:00pm
Sat: 8:00am - 5:00pm
Facilities
View Direction
The Ugly Duck
Address
1727 W. Sinto Ave, Spokane, WA, United States, Washington-99202
2556 mi
Hours
Mon-Fri: 8:00am - 5:00pm
Sat-Sun: 9:00pm - 3:00pm
Facilities
View Direction
- Choosing a selection results in a full page refresh.